
Instructions – Using S2S SaaS
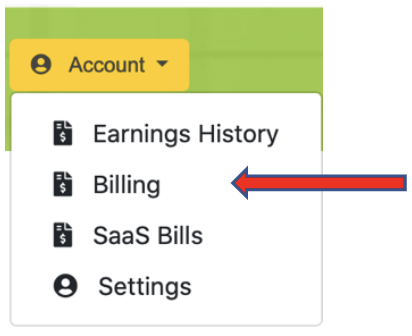
After successfully Submitting and Auto Verifying your applications, you can proceed to set up your S2S SaaS. Remember to go to Billing to enter your Credit Card Information for verification, to set your SaaS live.
- Go to the Overview to read all the details on our S2S SaaS Services.
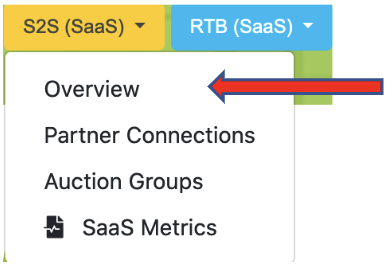
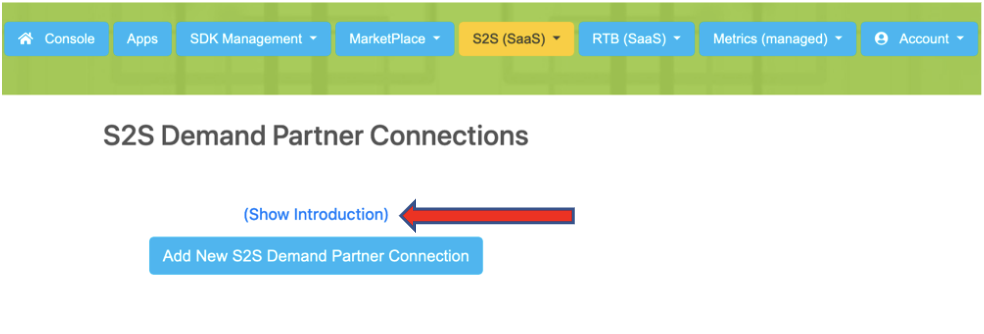
- Go to Partner Connections to set up all of your S2S Demand Partner Connections.

- Select the Show Introduction to read all the details to successfully add your S2S Demand Partner Connections.
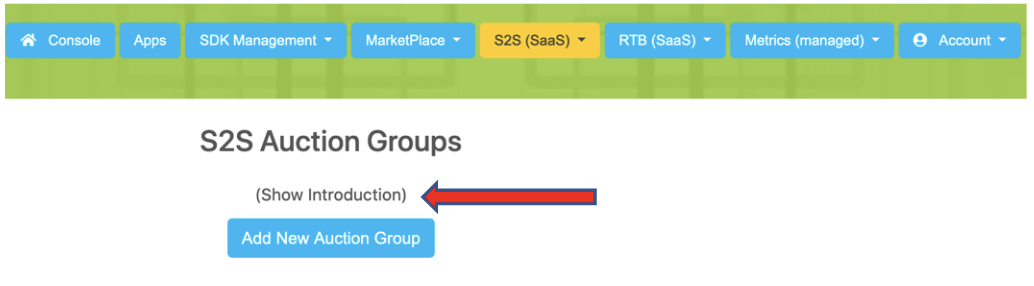
- Go to Auction Groups to set up efficient ad requests to your S2S Demand Partners.
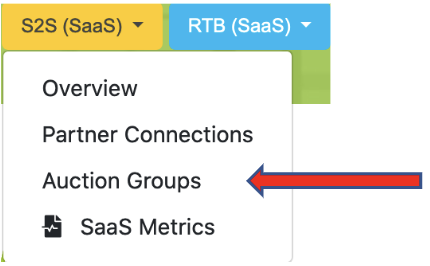
- Select the Show Introduction to read all the details to successfully add Auction Groups.
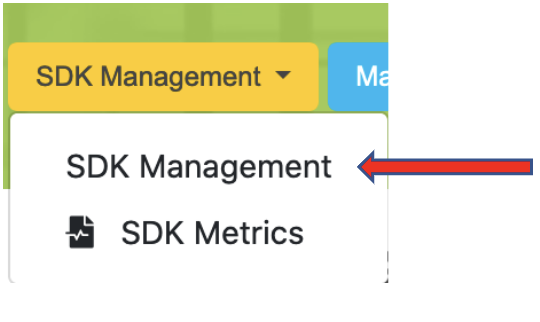
- Now that your Auction Groups are created, you can set them as line items in your SDK Management. Go to SDK Management.
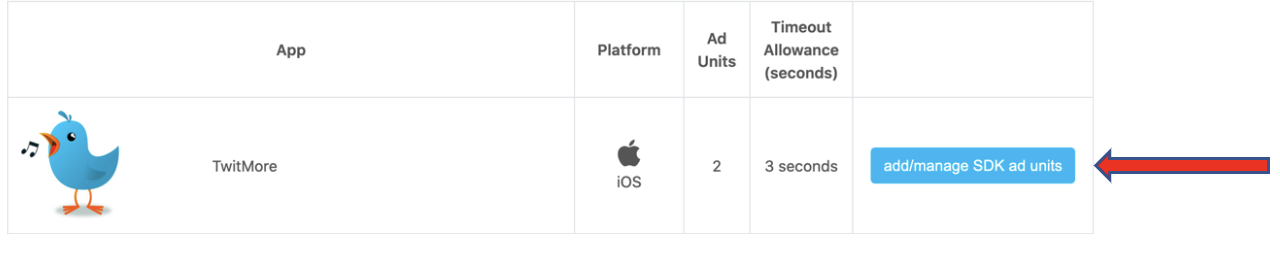
- Go to add/manage SDK ad units.
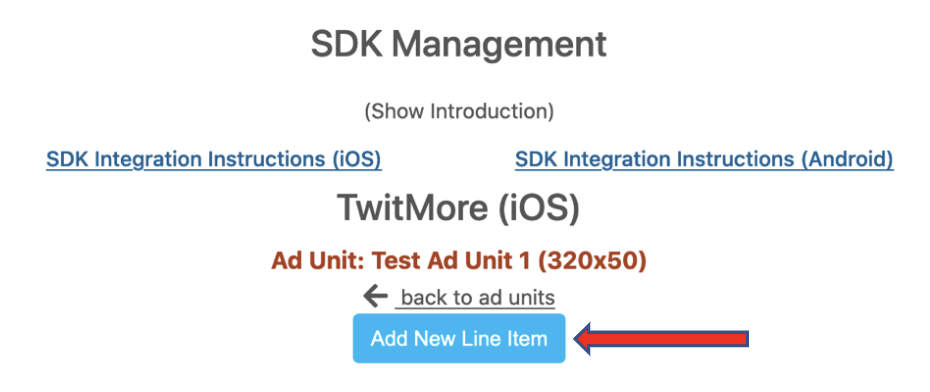
- Go to manage line items.

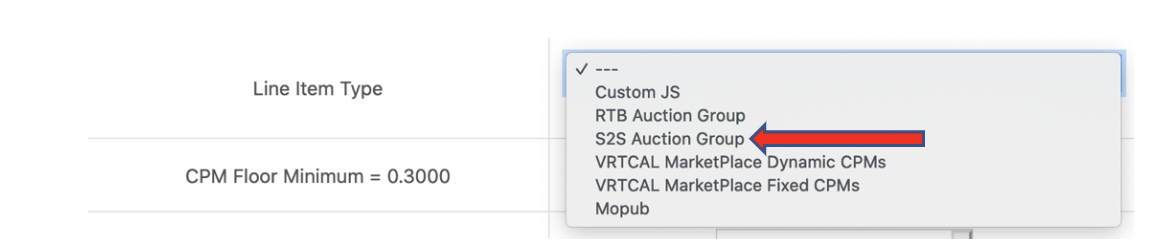
- Select Add New Line Item.
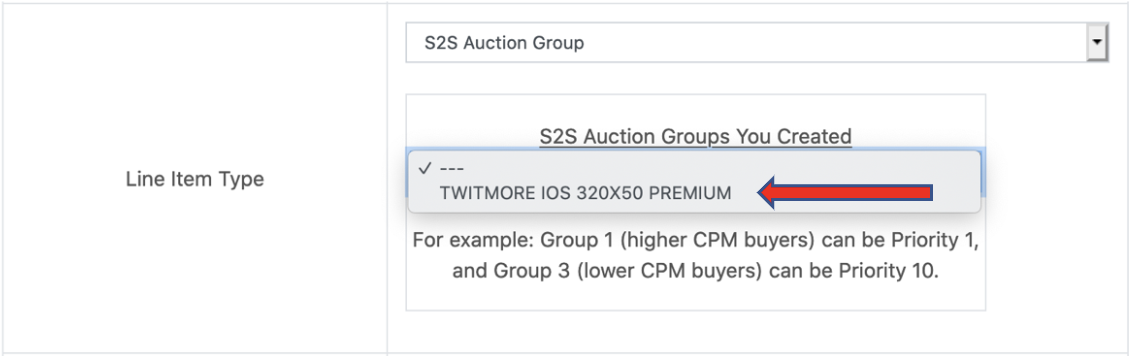
- Select S2S Auction Group.
- The Auction Groups you created for this specific app and this specific ad size will automatically appear. Select the Auction Group from those listed. If adding this auction group to display traffic, you will only see options for display S2S auction groups. If adding this auction group to VAST traffic, you will only see options for VAST S2S auction groups.
- Check to enable, set the CPM, set the Priority, name the line item and Click to Add Line Item.
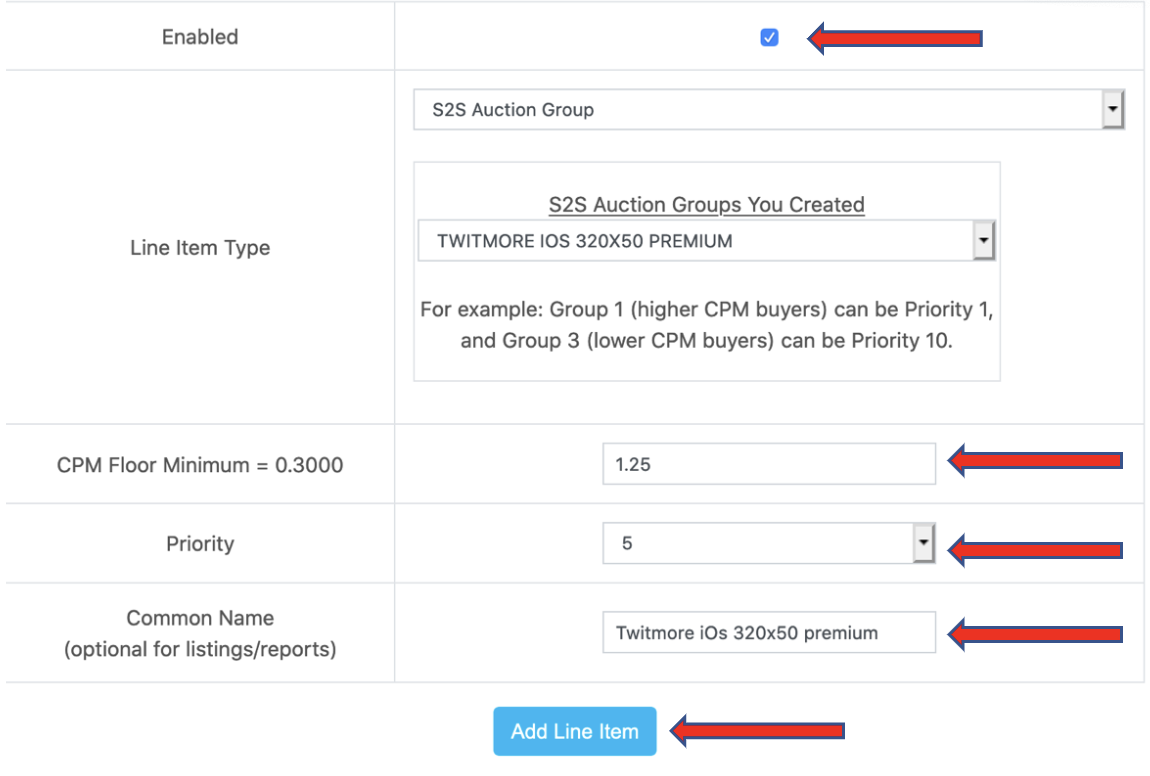
- To be able to Enable the S2S Auction Group, you will need to have your Credit Card Information verified in Billing.

You are able to have as many Auction Groups that you want. You can set your S2S Demand Partner Connections at fixed CPMs or to be Dynamic. Dynamic will set the CPM of the ad requests based on the CPM you set in the line item. All of this happens automatically.
If you have any operational or technical issues, contact support@vrtcal.com for assistance.