
VRTCAL SDK for Unity Integration Guide
Introduction
Follow instructions in this document to integrate VRTCAL SDK with your Unity project using our Unity platform plugin.
Minimum Requirements
The minimum requirements are the same as for our SDK. Please see our SDK integration guide for details.
Download the Plugin
Download the Unity platform plugin VrtcalPlugin.unitypackage from here
Project Configuration
- Import the platform plugin into your project:
- From Unity Editor, go to Project panel > Assets (right-click) > Import Package > Custom Package
- Browse to VrtcalPlugin.unitypackage and click Open
Android Project Configuration
- For better ad targeting, we recommend that you enable location updates by requesting the permission from the user (you can either request Fine or Coarse location permission):
- Starting from Android 8, clear HTTP traffic is no longer allowed by default. However, some ads still use the non-secure HTTP protocol. To allow these ads to display properly, allow clear HTTP traffic by following instructions on Android Developer's page https://developer.android.com/training/articles/security-config. If you need to use a custom AndroidManifest.xml, see Appendices for instructions.
iOS Project Configuration
- In addition to adding the Vrtcal Unity plugin to your Unity project, you will need to add VrtcalSDK to the resulting iOS project. We recommend doing this via Cocoapods.
Installation via CocoaPods
CocoaPods is a dependency manager for iOS projects which automates and simplifies installation of 3rd-party libraries. You can install CocoaPods with the following command:
$ gem install cocoapods
Add the following to your Podfile (or create if necessary):
Then run the following command:
$ pod install
If you wish to integrate without using Cocoapods, please see instructions here
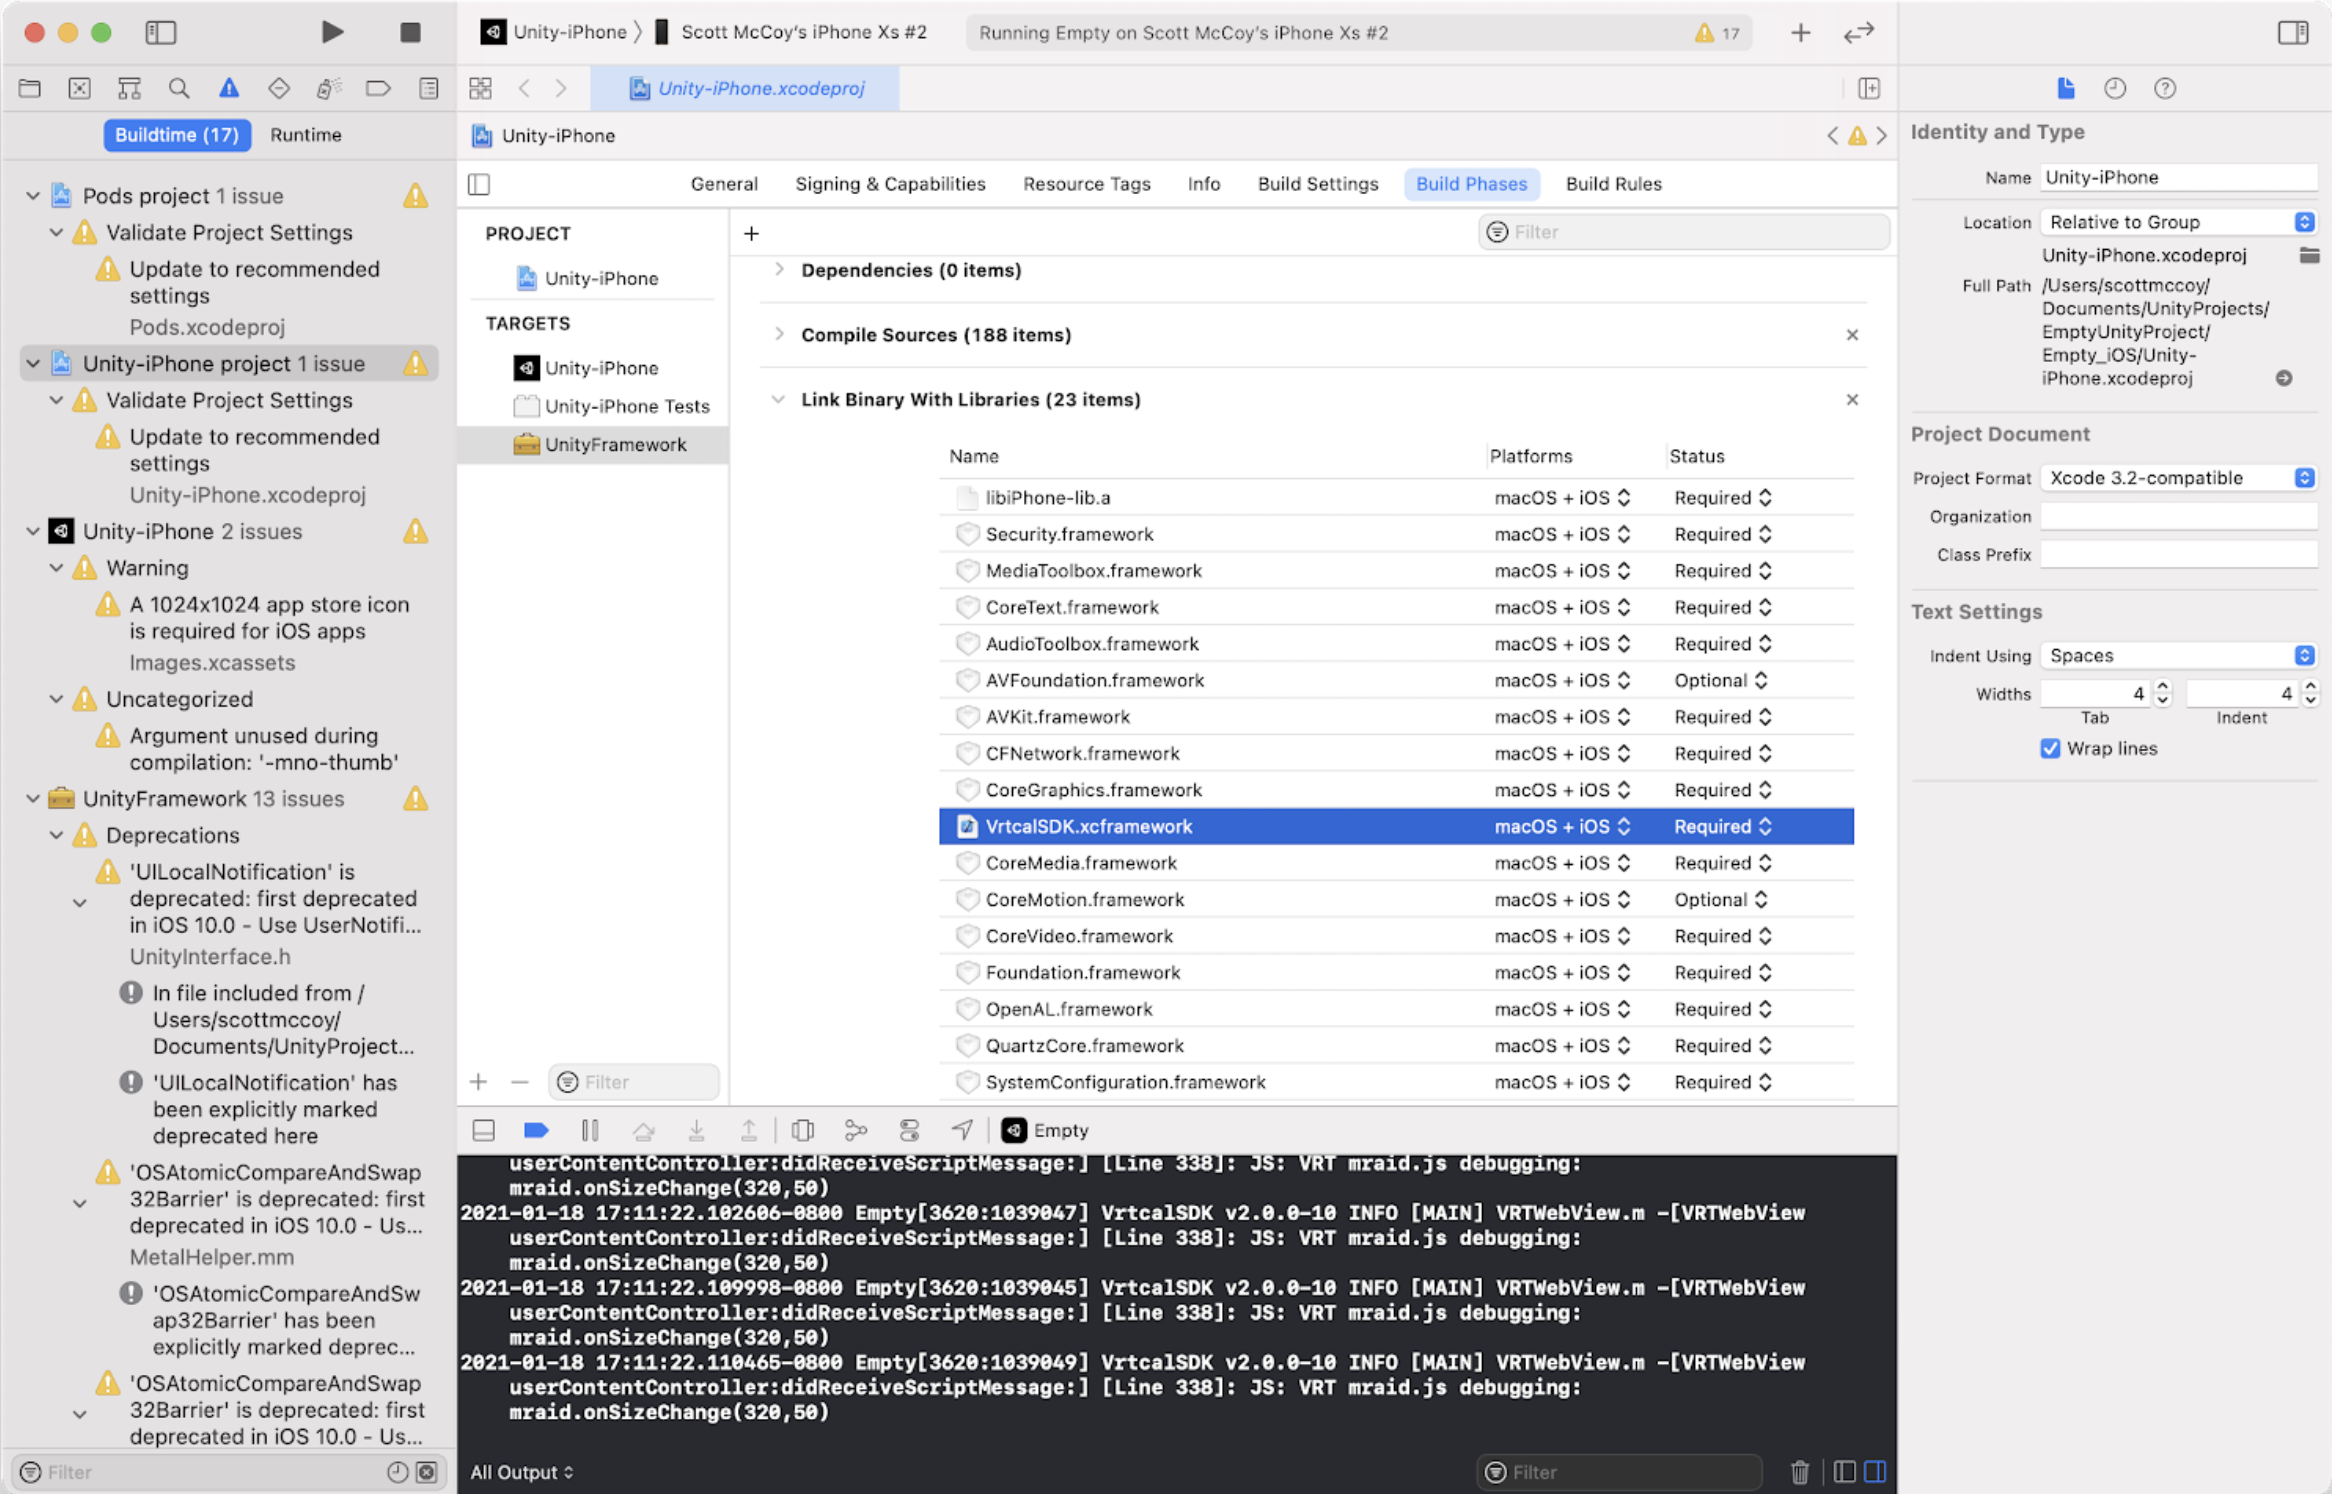
- Select the UnityFramework target and the build phases tab, then scroll down to Link Binary With Libraries. Scroll and click “+”, then Add VrtcalSDK.xcframework:
Initializing SDK
Before making ad requests you must initialize our SDK, as follows:
App ID can be obtained by adding an app in the SDK Management Section and following the instructions here We recommend that you make this call as early as possible to avoid delays later in ad requests.
You can optionally use event callbacks to check for SDK initialization status:
OnSdkInitializedEvent and OnSdkFailedToInitializeEvent are the listeners for SDK event callbacks. They both invoke a delegate method with a string parameter. For OnSdkInitializedEvent this parameter is not used. For OnSdkFailedToInitializeEvent, the parameter provides a reason on why SDK initialization failed.
Requesting Banner Ads
We provide three APIs for requesting banner ads. The first two APIs position the banner at the top and bottom, respectively:
Ad Unit ID can be obtained by creating an Ad Unit in the SDK Management Section by following the instructions here. The bannerWidth and bannerHeight parameters specify the size of container to be allocated for the banner. If they do not match the actual banner size, the banner ad will be centered in the container. Banners will be positioned within the safe area, as defined by Unity’s Screen.safeArea property.
For flexibility, we also provide the following API allowing you to position a banner at specific coordinates:
With the above API, you can place the banner anywhere, even outside of safe area if you so choose. You can also move a banner to a different location:
Note that all dimensions, i.e. x, y, bannerWidth, and bannerHeight, are in density-independent pixel units. E.g. if you have a 320x50 banner, use 320 for width and 50 for height, and do not scale them based on screen density.
When a banner is no longer needed, you must remove it with:
You can handle banner events as follows:
If you intend to show VAST ads, the following events may also be helpful:
Banner event callbacks are invoked with adUnitId and reason as parameters. The adUnitId parameter identities the banner that triggered the event. The reason parameter is only used by OnBannerFailedToLoadEvent event to communicate why a banner failed to load.
Requesting Interstitial Ads
Displaying interstitial ads is a two-step process. You must first load it with:
Ad Unit ID can be obtained by creating an Ad Unit in the SDK Management Section by following the instructions here Wait for OnInterstitialLoadedEvent (details below), signifying that the ad is ready to be displayed, then show the ad by calling:
If you load an interstitial but later decide that it is not needed, call the following to free up resources:
You can handle interstitial events as follows:
Interstitial event callbacks are invoked with adUnitId and reason as parameters. The adUnitId parameter identities the interstitial that triggered the event. The reason parameter is only used by OnInterstitialFailedToLoadEvent and OnInterstitialFailedToShowEvent events to communicate why an interstitial failed to load or show.
Important Notes
Ad Instances
Due to the nature of platform plugins, ad instances are referenced by ad unit ID and not by the runtime object reference (like in a native app). This has the following implications:
- In event callbacks, the ad unit ID is used to identify the ad that triggered the event. E.g. if you display two banners with ad unit IDs 10001 and 10002, respectively, and you receive a callback to OnBannerClickedEvent with adUnitId value of 10001, then it means the first banner was clicked.
- If you issue two “load ad” requests using the same ad unit ID, the previous ad object will be destroyed, and it will be replaced by the new ad object.
- If you need to load multiple ads at the same time (perhaps you have a banner at the top and another at the bottom), you need to set up and use different ad unit IDs, or else the plugin will not know which ad you refer to in follow-up calls.
GDPR
Our SDK will read the GDPR values from the app's local data storage (SharedPreferences for Android and NSUserDefaults for iOS) based on IAB Tech Lab CMP API Version 2.0 specifications.
Appendices
Custom AndroidManifest.xml (Android Only)
To use a custom AndroidManifest.xml:
- Copy <unity_install_dir>/Editor/Data/PlaybackEngines/AndroidPlayer/Apk/UnityManifest.xml to any temporary location.
- Rename UnityManifest.xml to AndroidManifest.xml.
- Copy AndroidManifest.xml to your
/Assets/Plugins/Android directory. - Make your changes. Then next time you build, the changes will be picked up by the build process.